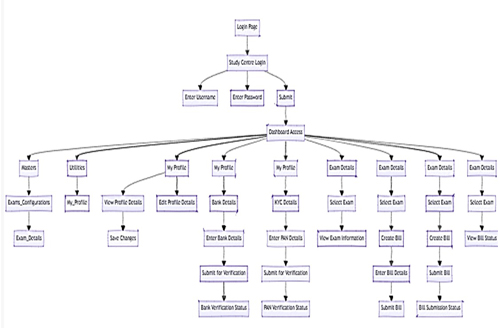
SC Login Q & A
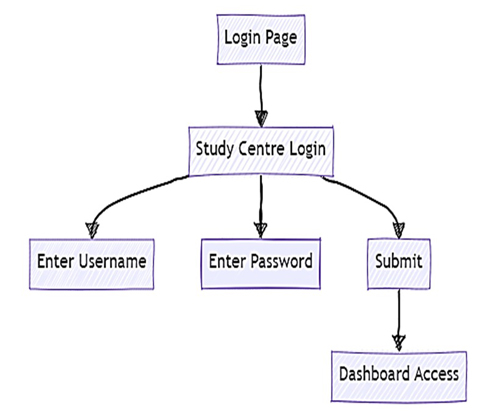
• Open Login Page
1. Open your web browser.
2. Go to the UniSuite Direct login page > Dashboard > Utilities
• Enter Credentials
1. Select Study Centre Login.
2. Enter your Username and Password.
• Login
1. Click the Submit button.
2. You will be redirected to the dashboard.
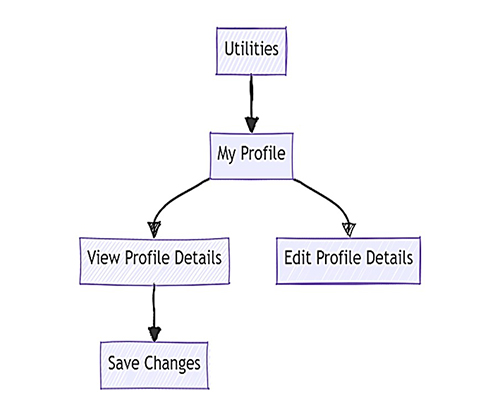
• Access Profile
1. From the dashboard, click on Utilities > My Profile.
• View Profile Details
1. Review your profile information.
• Edit Profile Details
1. Click Edit if you need to update any information.
2. Click Save Changes to save updates.
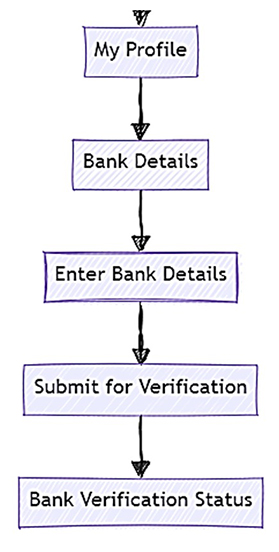
• Access Bank Details
1. From Your Dashboard, go to Utilities > My Profile
2. In your profile, go to Utilities > Bank Details.
• Enter Bank Information
1. Fill in your Bank Name, Account Number, IFSC Code, etc.
• Submit for Verification
1. Click Submit for Verification.
2. Check Bank Verification Status to confirm verification.
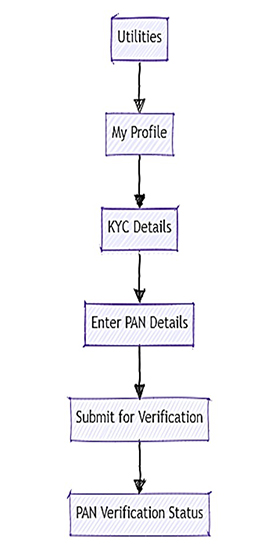
• Access KYC Details
1. From Your Dashboard, go to Utilities > My Profile
2. In your profile, go to KYC Details.
• Enter PAN Information
1. Enter your PAN Number.
• Submit for Verification
1. Click Submit for Verification.
2. Check PAN Verification Status to confirm verification.
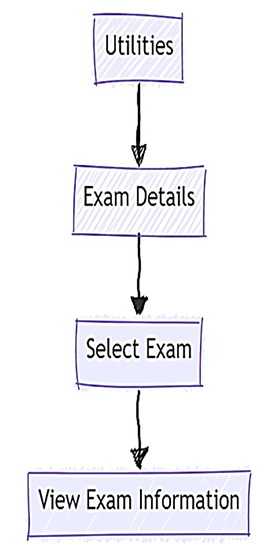
• Access Exam Details
1. From the dashboard, click on Masters > Exam Configurations > Exam Details
• Select Exams
1. Choose the desired exam from the list.
• View Exam Information
1. Review the exam name, dates, and other relevant information.
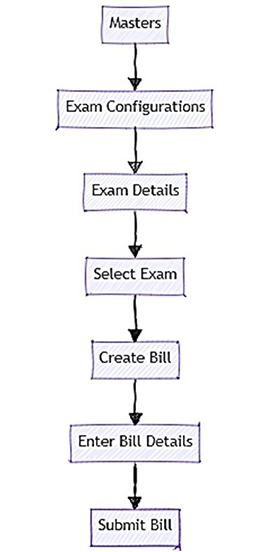
• Access Exam Details
1. From the dashboard, click on Masters > Exam Configurations > Exam Details.
• Select Exam
1. Choose the exam for which you want to create a bill.
• Create Bill
1. Click on Create Bill.
• Enter Bill Details
1. Fill in required details such as exam name, duration, subjects, etc.
• Submit Bill
1. Click Submit Bill.
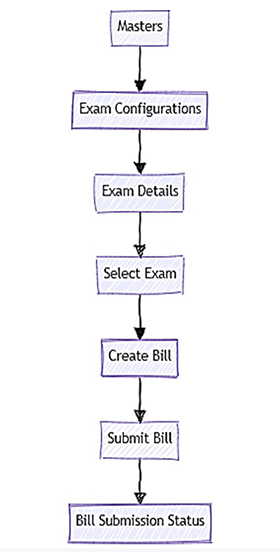
• Access Exam Details
1. From the dashboard, click on Masters > Exam Configurations > Exam Details.
• Select Exam
1. Choose the exam for which you have created a bill.
• Submit Bill
1. Click on Create Bill.
2. After entering details, click Submit Bill.
3. Check Bill Submission Status.
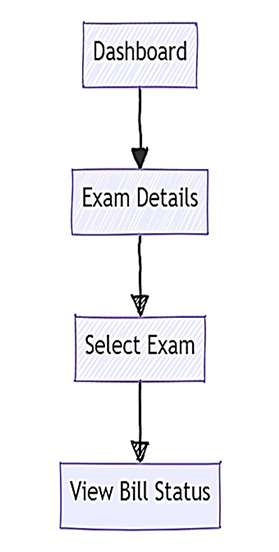
• Access Exam Details
1. From the dashboard, click on Exam Details.
• Select Exam
1. Choose the exam to check the bill status.
• View Bill Status
1. Click on View Bill Status to see the current status of your bills.